Page 2 of 2
Posted: Sat Feb 10, 2007 9:42 am
by mazmezroz
Deb and Malk, I have a 'thing' about raised beds, cos I am going to be doing some of my own this year, so forgive me interrogating you - your beds look fantastic!
Did you make them out of timber - they look green, did you paint them with special stuff? If they are timber, was it pressure treated/treated with Tanolith? What size are they? Can you come down and make mine for me??!! (Only joking, honest)
We're moving house soon (touch all wood, cross every extremity and pray), and I want to create a little veggie heaven in my new garden.
Posted: Sat Feb 10, 2007 11:24 am
by Deb P
oldherbaceous wrote:You're not the person that does those garden make-over programmes in a day are you.

No, thank goodness!

It's taken 6 months of steady clearing to get this far (and 13 trips to the local dump to dispose of all the stuff I couldn't use); still a bit to do yet, but this weather keeps getting in the way.........

As for the raised beds,they were made out of free large pallets we got from a local timberyard. They are 8'x4'(used for transporting MDF apparently, then thrown away!). The compost bins in the foreground are made from the same pallets. I bribed my teenage daughter to paint them, first with a clear wood preservative, then with some green woodstain, just for looks really! I don't expect them to last very long, but as the wood was free and helped me establish the layout of where to improve the soil and where the paths were, I think the work in constructing them was worth it. It also helps in making a rotation plan!
The other side of the plot I have left in more traditional long rows where I will be growing fruit (permanent beds), potatoes and squashes this year to help supress weeds and clear the ground. Getting all the couch out has not been easy!
Posted: Sat Feb 10, 2007 5:08 pm
by mazmezroz
Good recycling re: pallets. Will have to see if there's anywhere similar round our way.
I think it's certainly been worth the effort, the plot looks v. neat and - dare I say - easier to maintain?? Maybe that's just an illusion 'cos it's all so neat!
Posted: Sun Feb 11, 2007 12:22 pm
by Deb P
It only looks so neat 'coz it's mostly empty at the moment!

The allium raised beds have overwintering onions, garlic and shallots growing well, the others are either manured and covered (I am going to try JB's method for root beds, removing the manure before planting time) which adds to the 'neat' look. I'm waiting for the council to deliver some free shreddings to our site (first time they have done it) to use over membrane on the paths to keep the inevitable weeds down.
I had to spend a lot of time improving the soil in the raised beds, it was very impacted and acidic; I understand the plot had not been cultivated for quite a few years.
I don't think any plot is ever really low maintenence, but I hope the time I've spent setting it up will help me keep on top of it.....especially as I've not long applied for a second plot! It's addictive this lottie lark, and the space that looked so huge when I started is already planned and filled twice over.....
Posted: Sun Feb 11, 2007 2:41 pm
by Weed
Hi Deb
When I took my first half plot on five years ago and started to dig I really did have second thoughts.
After I had divided it into 'bite sized chunks' (gardening technical term)I have found it a doddle, so much so I took on another half plot eighteen months later...same again ..once I had it divided its turned out to be a piece of cake...well almost.
Posted: Sun Feb 11, 2007 3:51 pm
by Malk
Wow it's amazing what a little hard work gets you. Totally worth all the elbow grease.
raised beds
Posted: Sun Feb 11, 2007 3:55 pm
by Malk
Maz - I made mine with help from a guy on the plot who comes running when ever I try to pick up a hammer or saw. Probably for my own good, considering the damage I've done to myself over the years.
There're just made from old timber I've found, usually pallet wood, none of it's treated and I paint it with outdoor paint to waterproof it a little. It won't last forever, but it does the job.
Posted: Sun Feb 11, 2007 4:33 pm
by mazmezroz
Malk and Deb, your pix are v. inspiring. Watch out here I come with timber, saw and nails (run for cover...) Maybe someone will rush to my rescue too (not). My OH will just stand at kitchen window laughing at my efforts.
Posted: Mon Feb 12, 2007 6:53 pm
by tea-shot
Must be doing something wrong with these pics. I've been on holdthatpic and uploaded some photos of our lottie - that bit was easy

I've even managed to disable the BBcode but I don't have anything to replace it with. Am I supposed to email the pics to someone first?

So sorry to be a nuisance, esp when others seem to have little or no problem with this futuristic task

Also, my 15 yr old computer wiz is out tonight or I would have suffered the cringe of asking him for his help
Posted: Mon Feb 12, 2007 8:27 pm
by Weed
Hi TS
I use a programme called 'photobucket'...download picture, resize then cut and paste the lower url of three
Good luck
Posted: Tue Feb 13, 2007 9:41 am
by Malk
Tea-shot,
When you upload the photos in holdthatpic, they give you three lots of code - copy and past the BBCode into your message. Disable the BBCode at the bottom of your message and it should work.
Don't worry I had tons of problems figuring this out for another forum, so I only sound knowledgable because
you can't see the bald patches from my pulling out my hair from my own efforts.
Posted: Fri Feb 16, 2007 7:06 pm
by tea-shot
Thanks everyone for your help. I've had a pm from Chantal so I'll try her suggestions to see if they work.
Posted: Mon Feb 19, 2007 10:29 am
by tea-shot
Right

I've had a practise with this - now for the real thing.
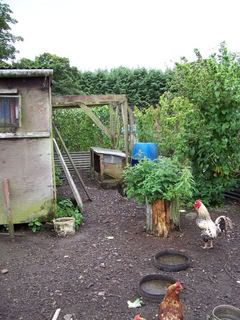
This was the hen run on 18/8/06
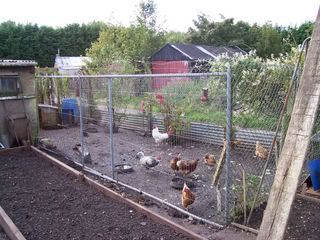
and this was taken after a bit of work on 3/10/06
Right lets see if this has worked

Obviously not so here's the first photo again