
The PolyShed... Part 1
Hi gang... I first posted a while ago and in that post I mentioned I was gonna build a PolyShed. a couple of people showed interest so i thought i would put together a post of what i did and what i ended up with.
This is so others can copy the idea etc or see how they can modify what they have to achieve the same...
The idea behind this was that Polytunnels are a want for a good few veg gardeners but normally the space is the bit that spoils the dream.
Others have also posted about homemade polytunnels but i wanted to build something as cheaply as pos using stuff I already had or stuff I got on the cheap/free.
the stuff i had list...
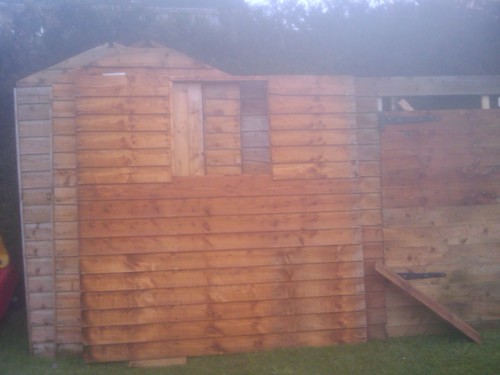
I had been given an old 6x4 shed that had been modified to take a scooter. this ment that one of the long sides had had a door added to it so its usability had been halved in length and due to how it was done repairing it would have been hard work and then would have left me with a Shed...
I didn't want a shed I wanted a PolyShed...
I have an old Lexan conservatory roof. it was actually brand new as when it was made it was an inch too small so was left and another made. I bought this of Ebay... it came with the metal trusses etc and plastic trims though i wasn't gonna use these as i wanted a more natural kitchen look so was gonna use wood. I found this on Ebay by using this site
local bargain finder
which when you punch in your details it finds all stuff in your area that is pick up only etc. bargains can be had from here so thank me later lol...an example of bargains would be the roof.... 99p.
I had a bundle of old bricks that were from our 1970's swanky fire surround. I kept these to put the shed on so it wasn't direct on the ground.
and a length of 5x3 left over from the raised beds i did for last year.
what i needed to buy...
would be abit of wood to make the framework for the Poly side of the PolyShed and also for a Ridgebeam.
After looking into what to cover one side of the roof with I decided to do that with wood too, i couldn't get any felt cheap (and B&Q wanted £18 for 15m when i needed about 2-3m) and the corrogated sheets were a little more so I got some 6 x 5/8 boards as used for fences etc and decided to use them on the roof overlapping and i could also use them for trimming up and holding the Lexan in place.
I got all the wood from a local Timber Yard for the cheap price of £38.
10 of 6x5/8 boards @3.6m long (for the roof and other trimming up)
6 of 2x1" pressure treated battens @3.6m long (for framing etc)
1 of 3x1" pressure treated batten @3.6m long (for the ridge beam)
and screws... which i already have and buy all the time so don't count as a cost but it might be £5 worth...
so the total cost is about £44.
Right on to the Build.
Surferal's PolyShed
Moderators: KG Steve, Chantal, Tigger, peter
The PolyShed... Part 2
The Build...
This will be mainly Pictures with a small description for each. hopefully they will explain the process i took and the final pics should show enough to give you idea's etc.
Before building I did sit and sketch out my idea and did some simple measuring of space i had to play with and how much i was limited by materials.
how many bits of Lexan i had and how big they were and how i could use them to get the most from the space etc. also things would be limited by how much of the Shed i could use.
After working it all out I went for it and measured up and started with the foundations.
The site for the PolyShed...
The PolyShed will run East West with the Poly side facing south.
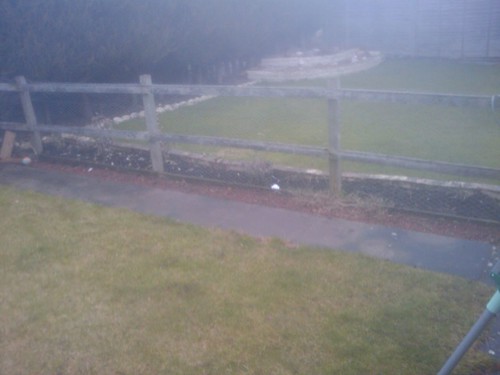
The free Shed.
The old bricks.

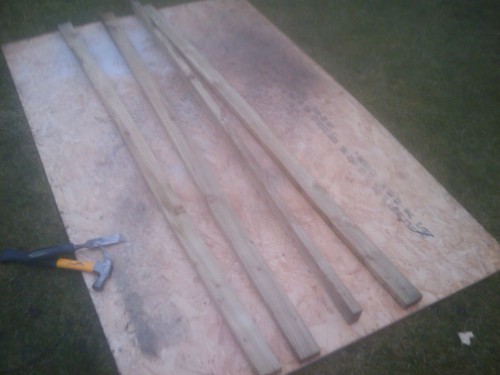
Job 1... remove the old joists off the Shed floor... these are gonna be used as the sill plate.
The Build...
This will be mainly Pictures with a small description for each. hopefully they will explain the process i took and the final pics should show enough to give you idea's etc.
Before building I did sit and sketch out my idea and did some simple measuring of space i had to play with and how much i was limited by materials.
how many bits of Lexan i had and how big they were and how i could use them to get the most from the space etc. also things would be limited by how much of the Shed i could use.
After working it all out I went for it and measured up and started with the foundations.
The site for the PolyShed...
The PolyShed will run East West with the Poly side facing south.
The free Shed.
The old bricks.
Job 1... remove the old joists off the Shed floor... these are gonna be used as the sill plate.
Green wasn't my favorite colour, but i'm getting to like it.
Bricks down as base... had to take turf off to get level. turf in the PolyShed will be lifted when done. might put bark down.
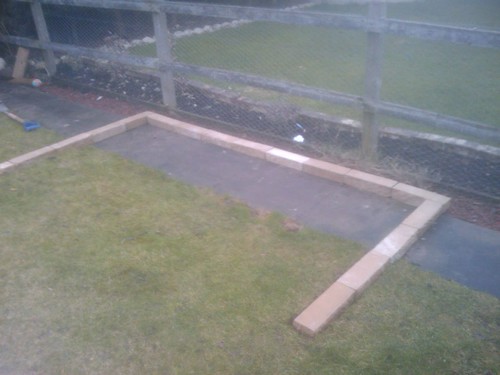
Old joists on bricks (with some DPC between 2) end panel (with door) offered up and first side piece.
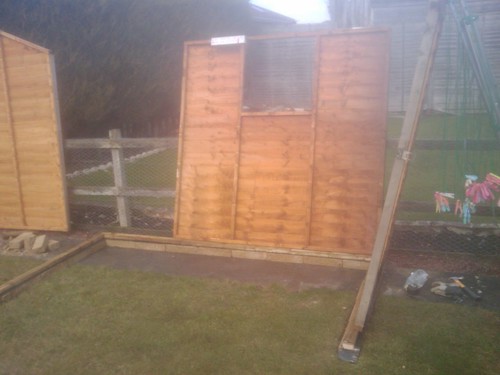
Side and end put and fixed together.
Old joists on bricks (with some DPC between 2) end panel (with door) offered up and first side piece.
Side and end put and fixed together.
Green wasn't my favorite colour, but i'm getting to like it.
The PolyShed... Part 3
The Build...
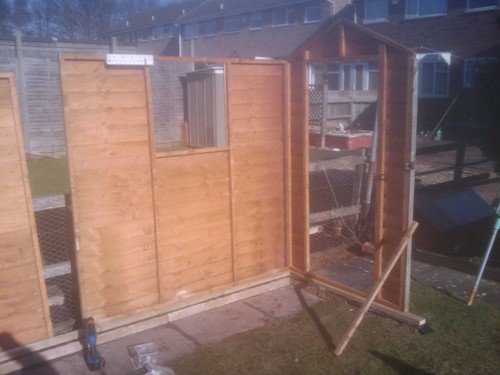
The other side piece and end piece put up. the side piece was cut down to get rid of where the door had been added. overall length is about 2.5m
Ridge beam in place. knotched at the ends so the roof line is level.
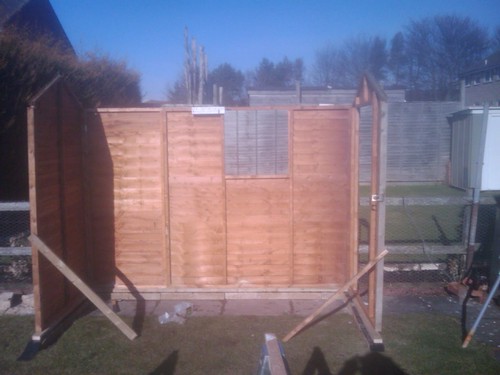
First bit of the shed roof put up. cos one side was cut in half I would have to cut a roof piece to match. To make it stronger I swapped the pieces over so the join in the side didn't line up with the join in the roof.
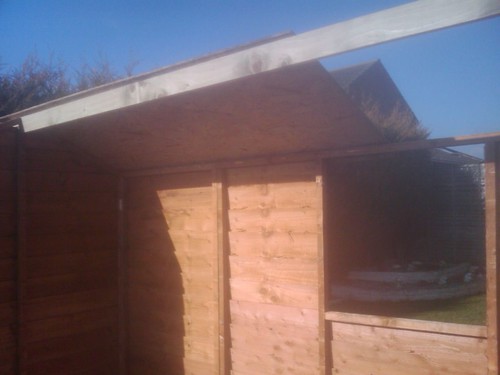
Other roof piece on. Front wall made to fit the Lexan I had.
The Build...
The other side piece and end piece put up. the side piece was cut down to get rid of where the door had been added. overall length is about 2.5m
Ridge beam in place. knotched at the ends so the roof line is level.
First bit of the shed roof put up. cos one side was cut in half I would have to cut a roof piece to match. To make it stronger I swapped the pieces over so the join in the side didn't line up with the join in the roof.
Other roof piece on. Front wall made to fit the Lexan I had.
Green wasn't my favorite colour, but i'm getting to like it.
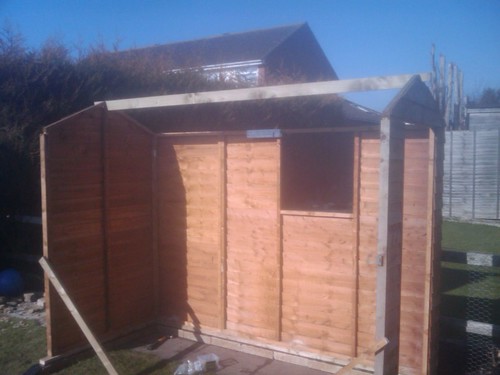
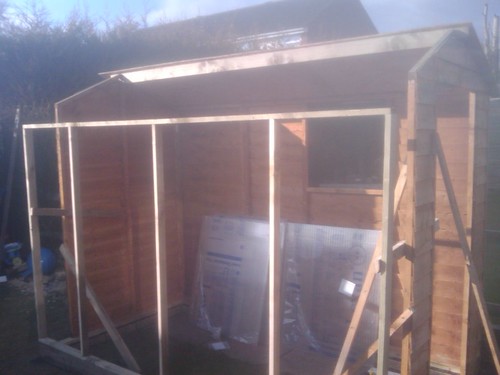
Trusses added. and the Lexan for the roof pieces was cut and standing in the shed. I will have to cut the 2 end pieces so they aren't as wide. i would have liked to have them full width but the Shed would have needed too much work to fix.
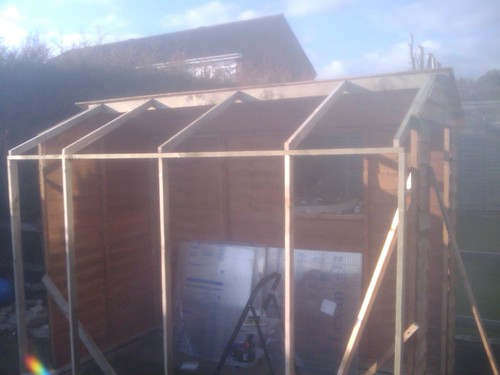
The framework so far
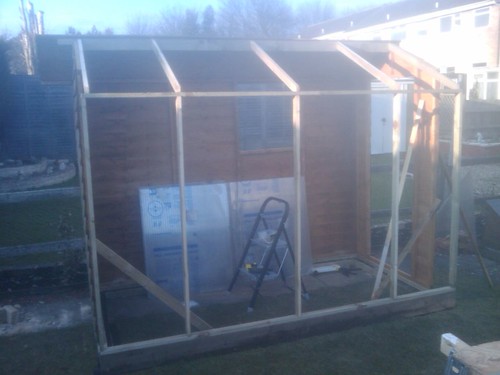
So now I need to sort and Cut the other lengths of Lexan for the front and the to thin side pieces. fix the door on (have 2 sets of hinges so might do a stable door. Sort the wood for the roof and trim up around the Lexan.
The framework so far
So now I need to sort and Cut the other lengths of Lexan for the front and the to thin side pieces. fix the door on (have 2 sets of hinges so might do a stable door. Sort the wood for the roof and trim up around the Lexan.
Green wasn't my favorite colour, but i'm getting to like it.
The PolyShed... Part 3
The Plastic...
Right after a bit of a break... due to the weather being naff (not me... its been under a tarp for a week hoping we weren't gonna get gales etc.) I did some more today tho it was cold n frozen this morn the Sun was out all day so got wrapped up and out there.
Really this was cos i wanna start to get stuff going and now being March I wanted to get it done so i have places for seeds etc...
Two of the four front sheets cut to length.
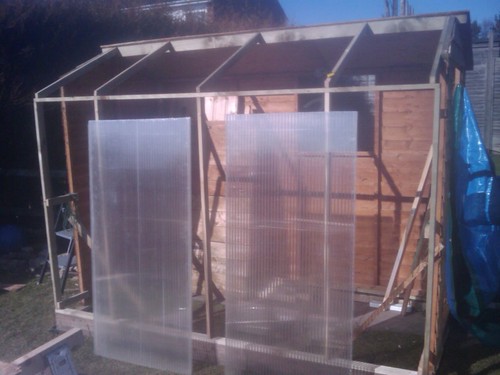
The middle sheets put it place and held there using battens that are 3" wide and are cutcut down from the 6" wide boards i bought that I am gonna use on the roof.
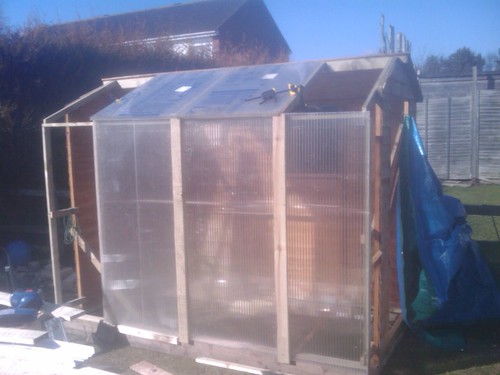
All the roof and front bits in place.
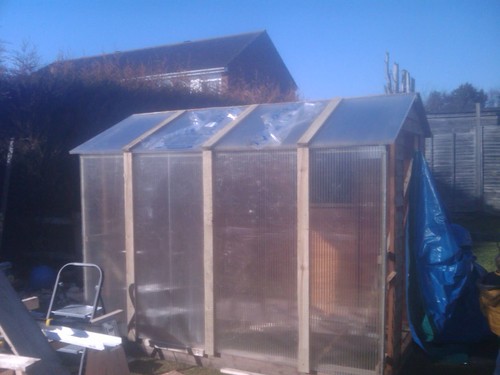
Battens put on the ends.
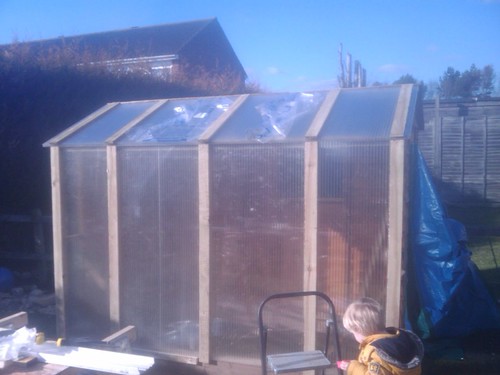
So now I need (more 2" screws lol) to sort the pieces of Lexan for the bits at either end. put a piece in for the window on the shed wall. hang the door (which I think will modify to be stable door type) sort the roof on the shed side. And finish up trimming the edges etc.shouldn't take to long.. and if the weather holds off might get in there to start sorting for staging etc...
Questions....
should i do anything for venting (ie for air flow etc, louvered vents?)
what do i put down on the ground, part is the path which will stay but on the Polyside its just the grass atm so was gonna lift it and either gravel or small raised bed?
gonna build my own staging but are there any good pics or sites to give me ideas on what i need? potting area? seedlings space?
The Plastic...
Right after a bit of a break... due to the weather being naff (not me... its been under a tarp for a week hoping we weren't gonna get gales etc.) I did some more today tho it was cold n frozen this morn the Sun was out all day so got wrapped up and out there.
Really this was cos i wanna start to get stuff going and now being March I wanted to get it done so i have places for seeds etc...
Two of the four front sheets cut to length.
The middle sheets put it place and held there using battens that are 3" wide and are cutcut down from the 6" wide boards i bought that I am gonna use on the roof.
All the roof and front bits in place.
Battens put on the ends.
So now I need (more 2" screws lol) to sort the pieces of Lexan for the bits at either end. put a piece in for the window on the shed wall. hang the door (which I think will modify to be stable door type) sort the roof on the shed side. And finish up trimming the edges etc.shouldn't take to long.. and if the weather holds off might get in there to start sorting for staging etc...
Questions....
should i do anything for venting (ie for air flow etc, louvered vents?)
what do i put down on the ground, part is the path which will stay but on the Polyside its just the grass atm so was gonna lift it and either gravel or small raised bed?
gonna build my own staging but are there any good pics or sites to give me ideas on what i need? potting area? seedlings space?
Green wasn't my favorite colour, but i'm getting to like it.
-
poppingjay
- KG Regular
- Posts: 24
- Joined: Wed Mar 18, 2009 7:17 am
- Location: sunny scunthorpe
I'm a bit short on advise but that is a most brilliant construction 
-
oldherbaceous

- KG Regular
- Posts: 13859
- Joined: Tue Jan 24, 2006 1:52 pm
- Location: Beautiful Bedfordshire
- Has thanked: 280 times
- Been thanked: 315 times
Evening Sureral, a very good job indeed.
One thing i must ask, have you fixed the polyshed down to the ground yet, i'm not trying to pick fault, but i would hate for it to get damaged by a strong wind.
It would certainly benefit from a vent the opposite end to the door, as it will get very hot in there in the Summer, it might be best to put this in the wooden part of the polyshed.
The stable door would be a good idea as you will be able to just leave half open.
I think if it was mine i would dig the turves off, put a few more slabs down where your benches are going then shingle the rest.
You then can have pots or grow bags where ever you want.
Regarding the benches, you could build them out of roofing battern, you can make this surprisingly strong by screwing them to the shed panels and cross bracing them.
Kind Regards, Old Herbaceous.
There's no fool like an old fool.
There's no fool like an old fool.
Hi....
Not been on much busy with new job etc...
anyway never did get round to posting pics of the (sort of) finished polyshed.
not quite finished as i want it but its usable. once it was up SWMBO wanted to get stuff growing so i never got a chance to board it out inside and put up shelves and staging. this should be sorted for next season.
oh and on a normal day it is always in the 30's in there. works a treat, today for eg it was 25mph winds and about 14degs. in the polyshed it was showing 22degs. should be good for early seeds etc next year.
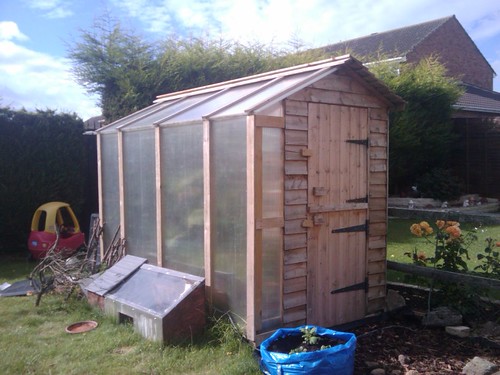
oh the small box in front aint a cold frame (well it is) thats where billy tortoise lives... tho she is getting ready to sleep for winter i think...
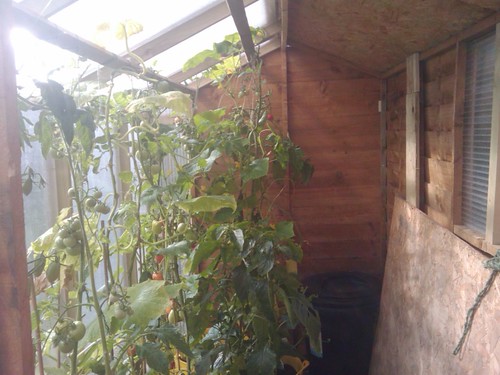
inside atm... see they grew pretty quick...

veg patch...
thanks... sorry it took so long.
Flickr page
Not been on much busy with new job etc...
anyway never did get round to posting pics of the (sort of) finished polyshed.
not quite finished as i want it but its usable. once it was up SWMBO wanted to get stuff growing so i never got a chance to board it out inside and put up shelves and staging. this should be sorted for next season.
oh and on a normal day it is always in the 30's in there. works a treat, today for eg it was 25mph winds and about 14degs. in the polyshed it was showing 22degs. should be good for early seeds etc next year.
oh the small box in front aint a cold frame (well it is) thats where billy tortoise lives... tho she is getting ready to sleep for winter i think...
inside atm... see they grew pretty quick...
veg patch...
thanks... sorry it took so long.
Flickr page
Green wasn't my favorite colour, but i'm getting to like it.
-
retropants

- KG Regular
- Posts: 2065
- Joined: Wed Feb 22, 2006 3:38 pm
- Location: Middlesex
- Has thanked: 111 times
- Been thanked: 113 times
Gosh, I missed this first time around......that is very resourceful! Amazing polyshed, and great tommie plants too! 
-
Nature's Babe
- KG Regular
- Posts: 2468
- Joined: Tue Nov 03, 2009 6:02 pm
- Location: East Sussex
This looks great, very resourceful of you, isn't it amazing, how cheap gardening becomes when we recycle! My OH is making me a poly house too at the moment, lol. He's using long old caravan windows on the roof so I can open up when its hot. BTW love the stable doors.
Sit down before a fact as a little child, be prepared to give up every preconcieved notion, follow humbly wherever and to whatever abyss nature leads, or you shall learn nothing.
By Thomas Huxley
http://www.wildrye.info/reserve/
By Thomas Huxley
http://www.wildrye.info/reserve/